I often receive a dozen emails in a day asking about my painting process and how I get some patterns that are not easily obtained with fluid, flow or accidental painting.
There has been a tsunami of acrylic pour paintings and fluid art painters in the past five years. Acrylic paint pouring was originally known as Accidental Art or unintentional art. There is a discussion on Quora on whether any art is intentional or can be accidental. This blog post is not really about that, but is focusing on the differences of my ink painting process and Accidental Art or acrylic fluid painting techniques.
If you are not familiar with Accidental Art, you can get a good overview here. I must say that once most people try it, they are hooked on it! This includes kids, people who have never painted, and people in their nineties. I demo and teach acrylic pouring to mostly kids. Here is a photo of the kid's pours of the last demo that Elena and I did at the Chavis Community Center for the Carolina Mixed Media Art Guild.

For my process, my only pre-planning prior to painting is to have my studio clean, assemble my chosen colors, and choose my panel size. I use Ampersand Claybord™ almost exclusively which requires no prep except for masking the sides of the cradle.
I am primarily working with the chemical and physical properties of the inks and paints to create the patterns. The viscosity and chemical composition of the inks, the porosity of the substrate, the humidity, and the temperature in the studio affect the patterns. I often say that how I hold my tongue in the process also affects the designs.
I rarely use a paintbrush, but instead drop, dribble, float, pour, splatter, or splash onto the substrate. However, this is not just throwing paint or ink here or there and hoping for a good composition. It is choosing the spot to drop the ink, choosing the ink that will be changed to a new color when the next ink is added, choosing the chemical compositions and the viscosities of the two inks to push the previous ink to obtain a particular pattern, and all at the same time paying close attention to how the first layer of paints or inks have begun to dry. Seconds will affect whether the intended results are achieved and which patterns are obtained. The inks must have some wetness or the second ink applied to the first drops will not allow the inks to spread to form patterns. During the process, I am continually analyzing how one area is changing and attempting to place the next inks where they do not interfere with the first inks. This is the biggest challenge of the process.
Some patterns are happy accidents, but I have been doing this so long that I know how many drops of one ink will force another type of ink to spread and the patterns I will get. I embrace the happy accidents and am quick to change where a painting was headed if necessary to get a good composition. Sometimes there is a point with a painting that I say to myself that this one is a lost cause. However, one more layer and then it may very well be my favorite painting. So I don’t give up easily.
Most of my paintings feature circles. It is the creation of these circular patterns that is so intriguing to me. I occasionally paint with no circles, but my work is known for its circles, and the layering of circles upon circles.
I usually work in color, size, or composition series. I have several different styles—some with lines, some with up to ten layers of painting and resin that give the paintings a dimensional quality, and some with metallic or mirrored leafing.
You can view samples of my ink paintings on my website. Here are a couple of paintings that show how one element or pattern is obtained by dropping one color into another color of ink. No tools are used except an eye dropper.


Acrylic pouring has a few similarities to my work, but still it is as different as painting with watercolors compared to oils. The similarities are that fluid acrylic artists usually work without brushes, and most often they float and tip to spread the paint. They most often use silicone (which I do not use in my ink paintings) that makes it easier to create the cell patterns that many desire. However, these are still uncontrollable to a great extent—esp. the size, shape, color, and where they manifest in the acrylic pours. My paintings on the other hand have each major element as an intention or a deliberate action, and I choose the colors and the location of the elements.
Here are a couple of acrylic pour paintings that I have done. You can see the cells that formed just as the patterns formed in my ink paintings. I did nothing except mix the paints and layer in a cup and flip it onto a board. It is very easy to see the difference in the effects as most of the designs are not symmetrical and most of the cells are small.

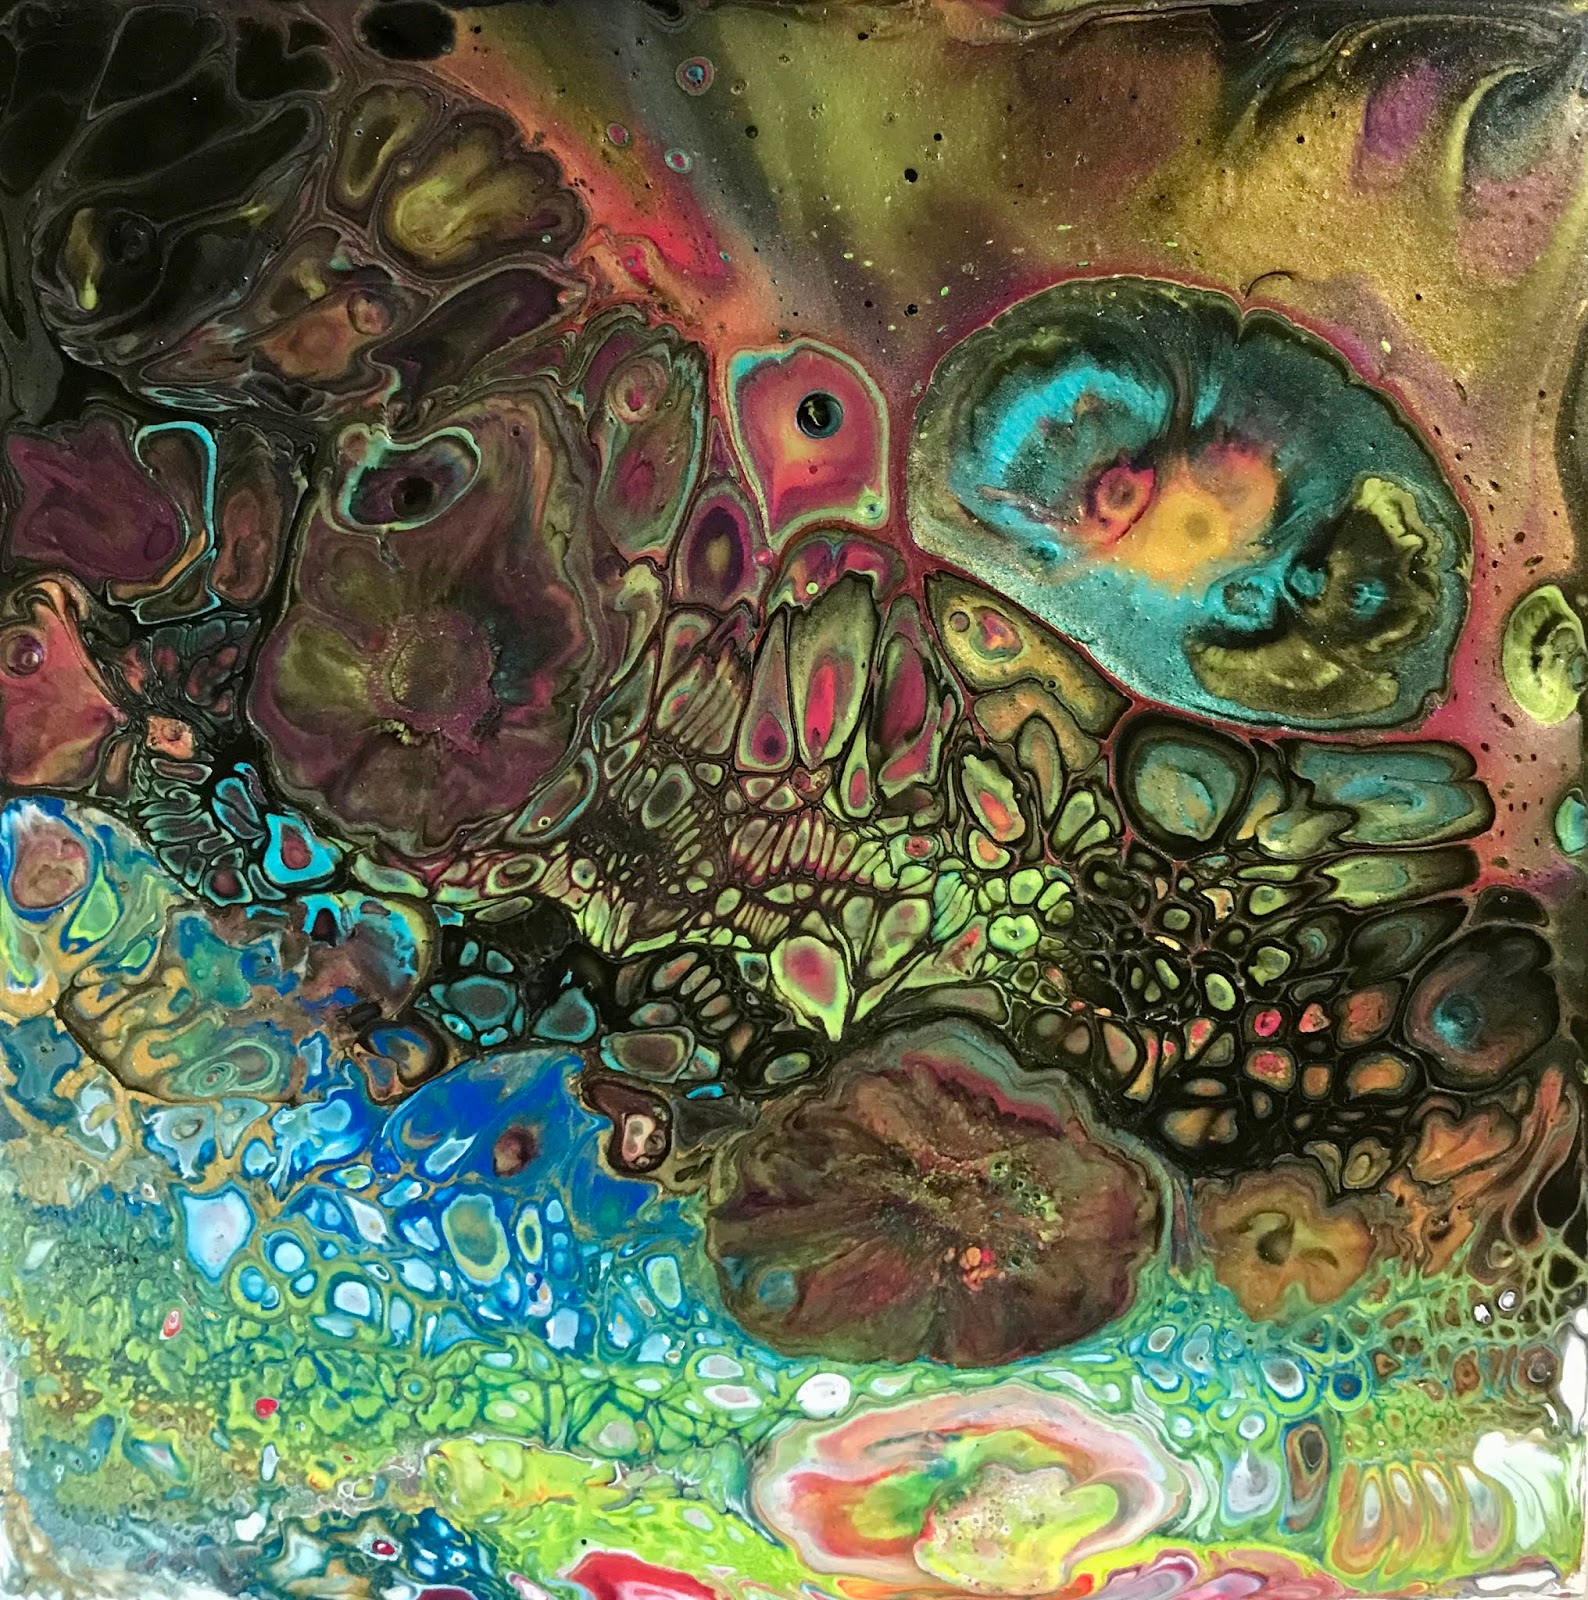
It is next to impossible to get a single symmetrical design element that is very large with acrylic pouring using most of the techniques that acrylic fluid painters use.
You may have seen the videos of a variety of colors of paint poured through a kitchen strainer to obtain a flower or blooming pattern. Except for a few designs such as those made by pouring one color of paint on another into a strainer or over a bottle, most acrylic pouring cellular patterns are anywhere from a few centimeters to an inch or two unless a tool such as a strainer is used to control the mix of the colors. The ones that are larger tend to be one circle of one color paint poured into another circle of paint and on and on, but perfect circles are not the most often obtained patterns. One can get large areas that are flowing with acrylic pouring, but this is not anything like my paintings. I have been able to make a 24” in diameter circle with interesting symmetrical designs within much like a mandala. This is difficult with most acrylic pouring techniques. My large circular designs are caused more by a chemical reaction than the circles made with acrylic paint pours. I do not use a strainer or any special tool to get my designs.
You may have seen the videos of a variety of colors of paint poured through a kitchen strainer to obtain a flower or blooming pattern. Except for a few designs such as those made by pouring one color of paint on another into a strainer or over a bottle, most acrylic pouring cellular patterns are anywhere from a few centimeters to an inch or two unless a tool such as a strainer is used to control the mix of the colors. The ones that are larger tend to be one circle of one color paint poured into another circle of paint and on and on, but perfect circles are not the most often obtained patterns. One can get large areas that are flowing with acrylic pouring, but this is not anything like my paintings. I have been able to make a 24” in diameter circle with interesting symmetrical designs within much like a mandala. This is difficult with most acrylic pouring techniques. My large circular designs are caused more by a chemical reaction than the circles made with acrylic paint pours. I do not use a strainer or any special tool to get my designs.
Yes, we are all masters by accident of acrylic pouring! Even my two year old granddaughter’s first painting would have been considered a masterpiece. ;) However, there are those who have made their acrylic pours as backgrounds for their previously developed art style and their pours are now a signature part of their recognizable style.
I do not want to make it sound like there is no control over acrylic pouring. To become good at it consistently, one has to do many pours. An acrylic fluid painter can work at developing paint formulas and color palettes that become recognizable as the artist’s work. But it is very, very difficult to get to that point with acrylic pouring as there is so much left to chance. I can name fewer than ten acrylic fluid painters out of the 25,000 acrylic pour artists in one forum I am on that I can put an artist’s name to their paintings the moment I see their paintings. So it is a real challenge to make a style one’s own with acrylic pours due to the lack of control with the process.
I had made a post about eight years ago on artists who worked in similar processes as I work. It is here if you wish to read it. My next post may be on artists who work in a similar style as mine and have made it their own.
I had made a post about eight years ago on artists who worked in similar processes as I work. It is here if you wish to read it. My next post may be on artists who work in a similar style as mine and have made it their own.